

Paint job not exactly perfect? Tiles slightly uneven? A tiny gap in molding? They’re all examples of little issues with your home’s basic construction that really aren’t a big deal at all. But stress cracks in drywall are a different story altogether.
Table of Contents
What is a stress crack?
Why’s that? Because a stress crack in drywall, also known as gypsum board or wallboard, is a sure sign that your home’s internal walls have become structurally unstable. Over time, those stress cracks will worsen, deepen, and lead to safety hazards and major repairs. Worse still, they’re a potential sign of underlying problems with your home’s foundation or dampness – and the need to react quickly to limit the damage and save on some huge bills.
- Seeing diagonal, horizontal, or vertical cracks?
- Is there a visible separation between drywall sheets?
- Seeing cracks near windows, doors, or ceiling junctions?
- Cracks keep reappearing after a simple patch?
- Noticing changes in wall texture & paint?
- Drywall cracks widening over time or with the seasons?
- Drywall cracks appearing in multiple rooms?
- Cracks coinciding with uneven floors or sticking doors?
Learn how to fix cracks in drywall
Oh dear – it definitely seems like you’re struggling with some drywall cracks. But before calling in a professional drywall contractor, let’s see if we can just patch things up for now and then hope for the best. All you’ll need is a joint compound (mud), as well as some mesh drywall tape and some other basic DIY materials. You’ll also need a little bit of luck because while you can apply a cosmetic fix like this quite easily, it won’t address any underlying structural issues that may be causing your walls to crack:
1. Prepare
Before getting started, make sure the area around the crack is clean and free of dust, dirt & debris. A damp cloth will be good enough.
2. Apply the tape
Apply a strip of mesh drywall tape over the drywall crack, ensuring it extends a few inches on both sides of the damage. Press it down firmly, smoothing out any wrinkles or bubbles.
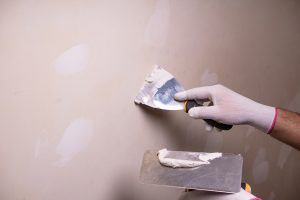
3. Apply the joint compound (mud)
In the drywall world, we call joint compound ‘mud’ – because it’s very much like wet mud or clay when it comes out of the tub. To apply it, you’ll need a putty knife to thinly spread it over the mesh tape. Start in the center of the tape and work outwards to blend it with the undamaged wall. Once you’re done, let it thoroughly dry and set for a few hours.
4. Sand & apply a second coat
Use a medium-grit sandpaper to gently sand the dried mud so that any ridges or bumps are smoothed out. Now apply a second thin layer of the joint compound, extending the edges a little beyond the original layer. Wait another few hours for this layer to dry.
5. Sand & finish
Now with a fine-grit sandpaper, rub gently to get a perfectly seamless, smooth finish. Wipe away the dust – and your drywall patch is now complete!
6. Prime & paint
To really finish the job, apply a coat of primer. This is necessary to help the patch to seamlessly blend with the wall’s existing paint. Once that’s dry, finish the job with the same color paint as the original.
7. Inspect
Once the paint is dry, make sure the repaired area looks flawless in various light conditions – in the day, with the curtains open and closed, and with the lights on at night. How does it look? Passes the visual test?
How the Pros fix stress cracks in drywall
If your repair is not good enough, or the crack simply comes back in the future, you’re going to need a better repair job than this, which may involve:
- A detailed structural analysis
- Specialized joint compounds & elastomeric sealants
- Expert layering methods
- Reinforcement materials like fiberglass
- Expansion joints
- Underlying structural repairs.

But with a little luck, this Handyman Guide has worked a treat! Check out the other DIY guides in our Handyman Tips section – or get in touch with the friendly team at Handyman Guides directly. We can’t wait to hear from you!
Founder of HandymanGuides.com and self-proclaimed “Mr. Fix-It”, Mike has countless years of experience building and tinkering with everything under the sun. He works as a local repair guy near Santa Monica, CA and when he’s not spackling drywall, he enjoys spending time with his wife and 2 daughters.
Related posts:
 How To Spackle Drywall Holes Like A Pro
 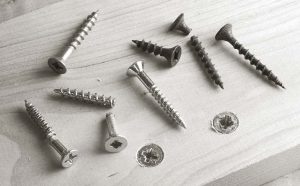 Choosing The Right Drywall Screws: A Comprehensive Guide
 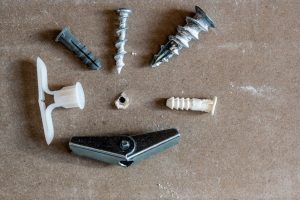 8 Steps For Getting The Wall Anchor Drill Bit Size Right
  5 Steps For Choosing Between Titanium VS Black Oxide Drill Bits
 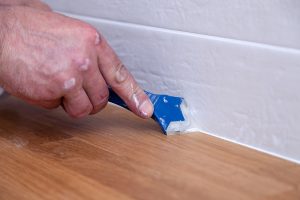 What is the Difference Between Spackle and Joint Compound?
  What Gauge Nails to Use for Baseboards